
Quick links: Printables / Adafruit / Switch List
…And we’ve got buttons!
Before getting too far into the details of how this version came together and where it is now I just wanted to say thank you so much to Andy who has done so much of this project. Between the engineering, the 3D printing, and the programming of the software itself, honestly this would not have come together without him, so again, thank you Andy and let’s dive on in!
The initial goal of this project was to make use of my left hand because unfortunately due to atrophy getting old, and just small amounts of usage on a regular basis it’s no longer able to work in any capacity other than driving my wheelchair. Actually, I rolled over the other day and I just barely grazed my nose with my hands so I’m going to say that I scratched my face but other than that, it’s pretty useless. But seriously that means if I want to play video games, give somebody the finger, or use a keyboard is completely impossible unless I have a time machine. Those happen to be three things I used to enjoy quite a bit but because of what we’re building there’s a good chance I might be able to achieve two out of three of those functions again one day!
Spoiler alert: it worked really well!
I thought we could look at each aspect of the joystick platform meaning the hardware, the keys, the software, and how it ended up working in the end.
The Hardware
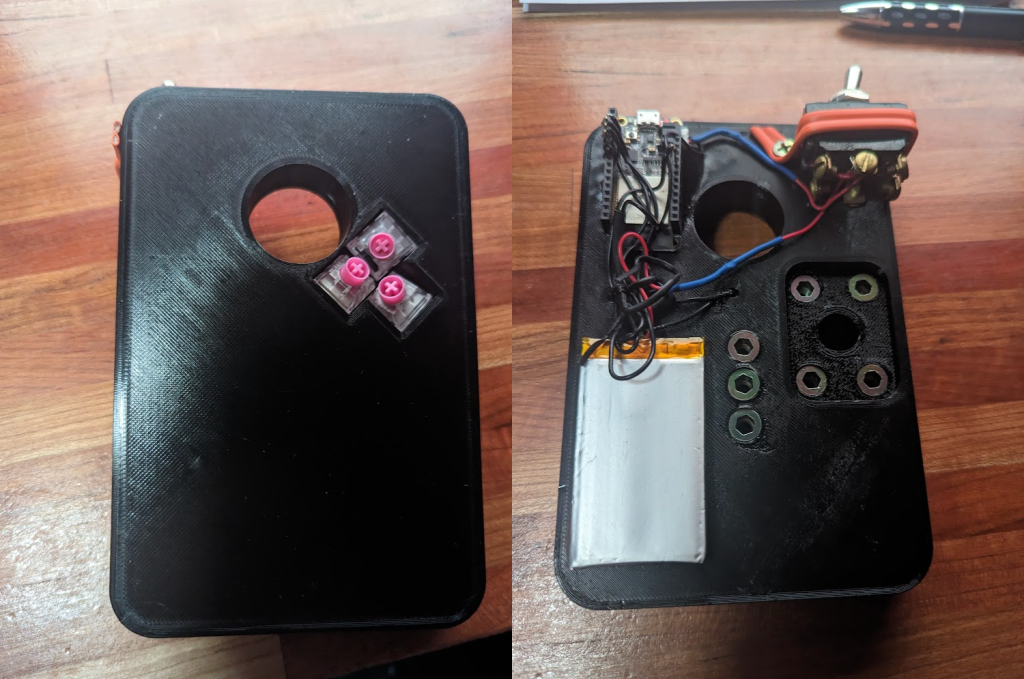
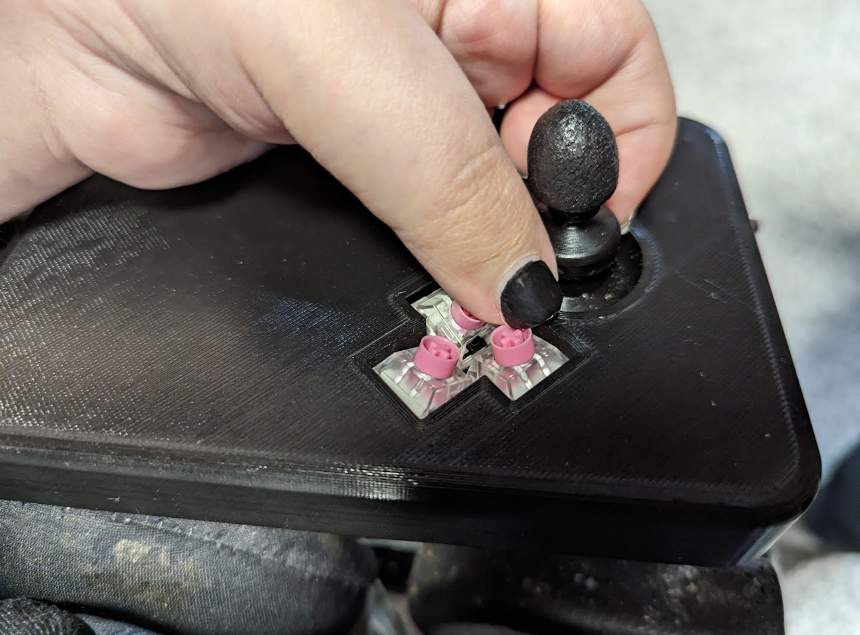
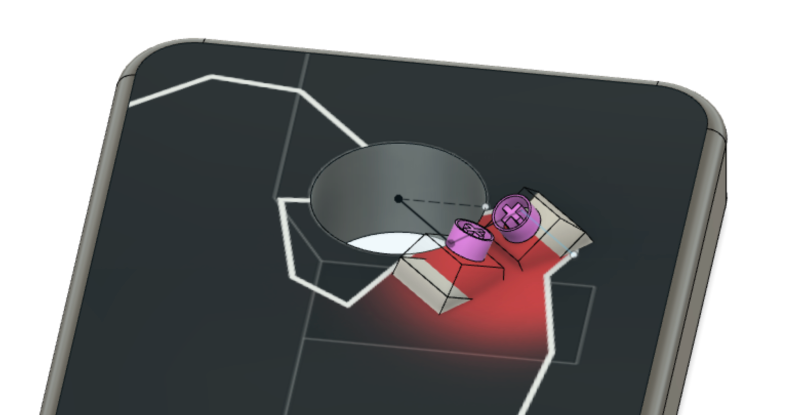
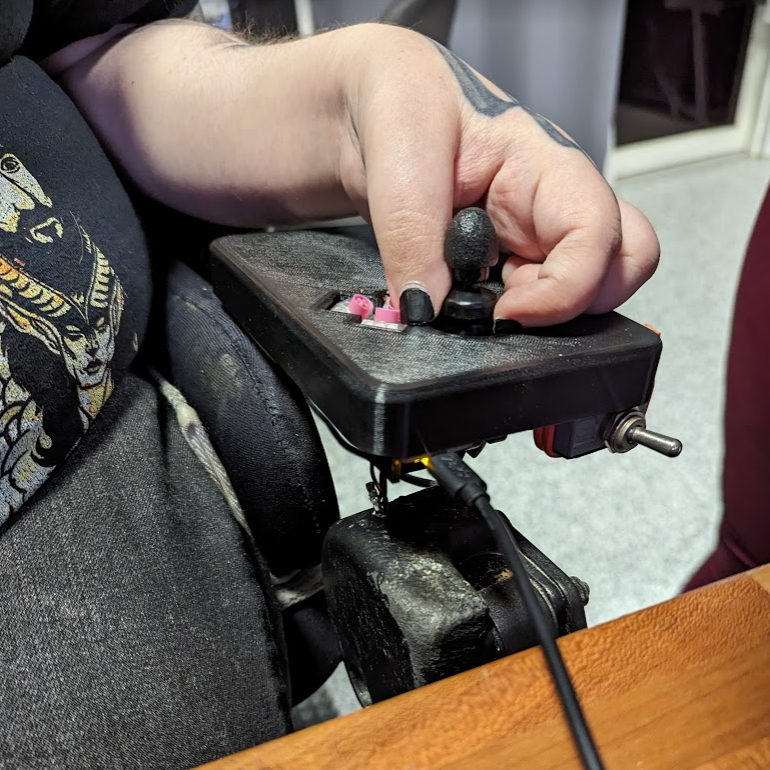
As you can see above this is quite different than the Lego version from the previous iteration. We’ve a black platform this time with no Lego bumps as well as looks like keyboard switches without keycaps on the left near the hole for the joystick and on the right it looks like we have a bunch of…let’s just say fancy looking technology attached to the bottom.
Spoiler alert: the components hanging off the bottom got stuck on something and I ended up ripping out the cables and only got to use the device for a couple days. Those couple days though we’re awesome.
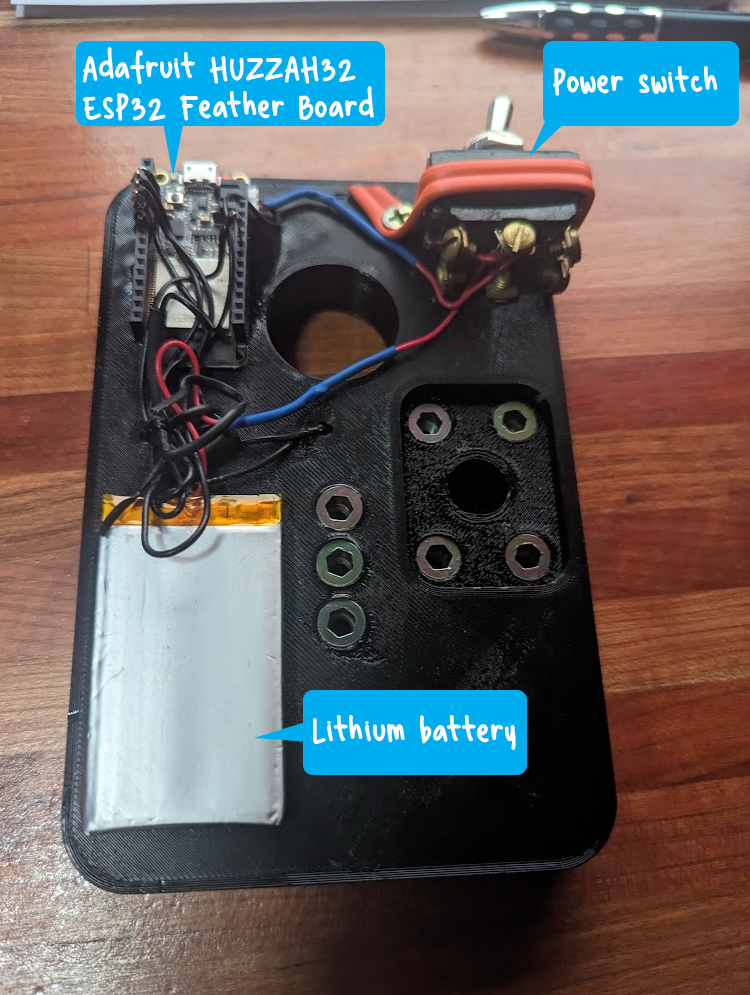
So what is all this stuff that’s connected to the bottom of the joystick platform? It’s basically four main components: the ESP32 Feather Board for the main computation, connected to that are the keys up top, a switch (that looks pretty heavy duty for some reason) to power on the board, and a battery (that Andy found laying around) to power the board. You can tell that Andy’s the type of guy that’s doing all sorts of projects because he’s got switches and lithium batteries that he doesn’t remember where he got them from and isn’t sure if they’re going to work real long just sitting around his office waiting to be used. Anyways, the main piece here is the board, so let’s talk about that.

Basically everything is connected to this monster. So what can the ESP32 Feather Board do? Seems like it can do a whole heck of a lot. Built in it has Wi-Fi as well as Bluetooth which is exactly what we needed to connect to multiple devices for my usage, a USB port for charging as well as powering if we didn’t have a lithium battery connected, a dual core processor for chugging through our code, and a bunch more cool and technical stuff. The best stuff is technical stuff. So basically this thing is the brains of the operation, without this thing our ideas are just the dreams of a madman.
The Keys
So you’ve probably noticed that the keys on the platform align right underneath my thumb. How did we come up with the heat map for the thumb location? Basically I just traced around my thumb and hand so that we could lay that out on top of the platform itself and then derive a location for where the buttons should be dropped in.
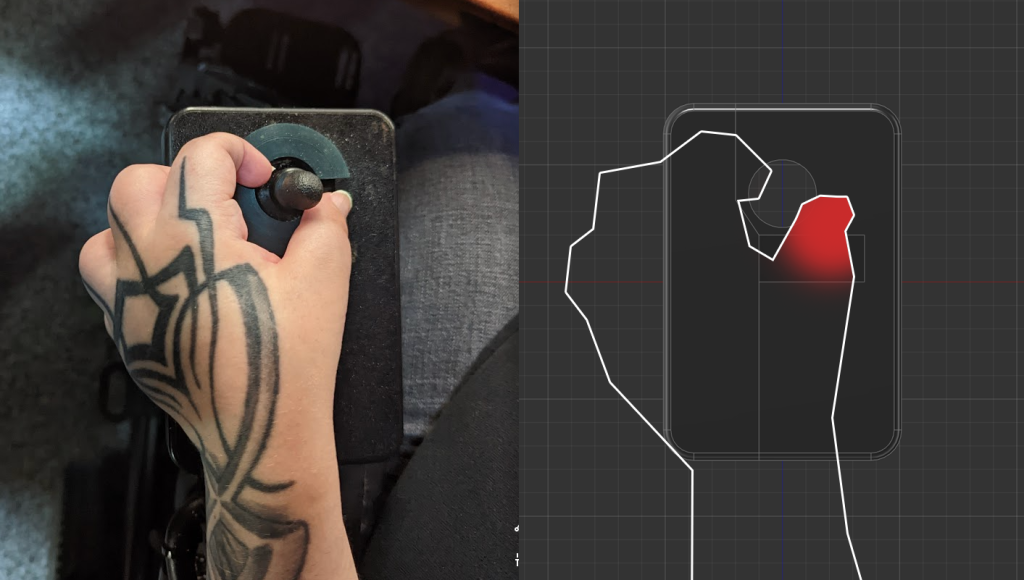
Andy was clever enough to drop the heat map on to the actual 3D model in Fusion 360. This way he could drop the buttons in perfectly and then measure what the distance my thumb would need to travel as well as how to pitch each one of the keys towards the end base of my thumb. He made sure that despite the angle, the switches are connected to the board through the joystick platform connecting together beneath.
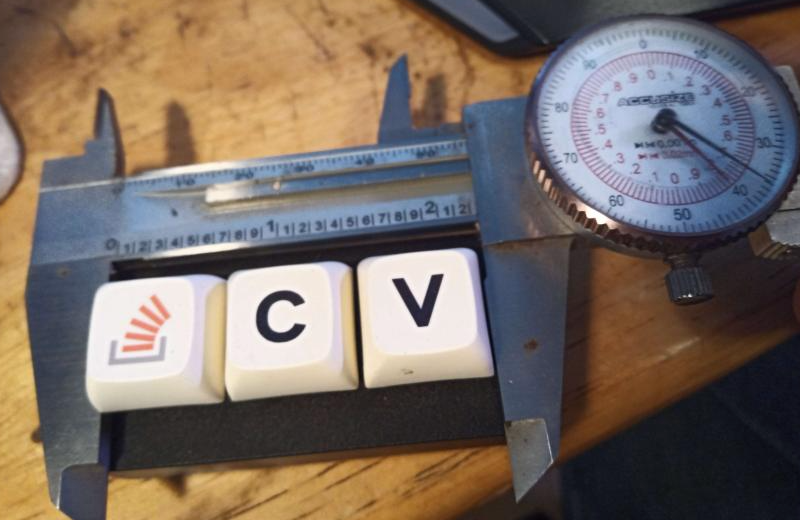
We considered two key switches but then as long as we’re going that far we might as well try to fit in another one. My most popular buttons in art software and in basic Windows functions are control, shift, and alt so three buttons matches this need perfectly.
How did we choose which keyboard switches to use? It was essentially a decision based on which switches are available that are the easiest to press in terms of actuation force. This is a chart of all the switches available their important figures like actuation force which is how much pressure it takes to trigger the button, the type which is if they click like mechanical keyboard keys or just move linearly, and how far the travel is which is how far is the distance from its normal up state to registering the key down state. For me those are the three most important details because it’s tough for me to press buttons based on how much force is needed, if there’s any additional obstacles, and how far my fingers have to travel to actually trigger the button. Lately my hands are becoming so weak that it’s difficult to press the left and right click on a common computer mouse so picking the right key switch is very important to the success of this iteration.
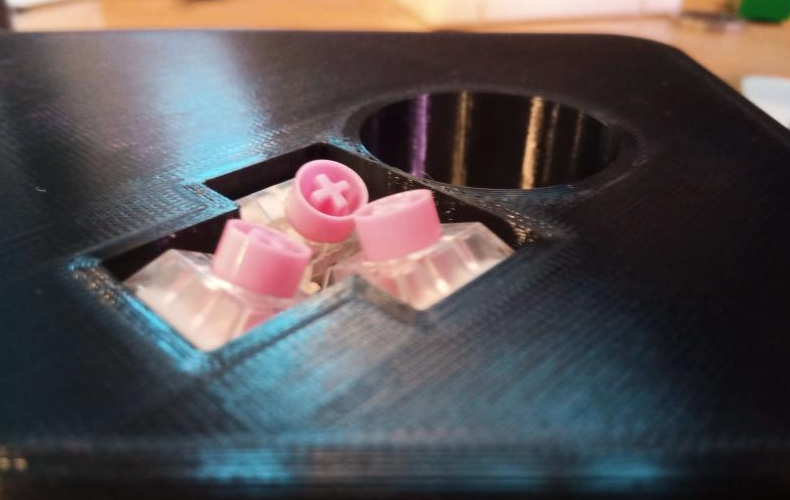
So why are they tapered inward? If you notice the heat map is very limited. At this stage of my disability gaining new function is quite the task if not impossible so maximizing any of the reach that my thumb would have is a better option. So I thought the way that we could maximize the amount of buttons I can press would be just to get as many buttons as we can as close as we can but then also taper them so that even though I might have to push in different directions, it won’t be so bad because the starting point for all the buttons are very close to each other.
The Software
The software that Andy designed is called DriveKeys. He had me download the Arduino IDE to edit code so I can’t remember if the whole project is done in that or if it’s just the software layer that I interact with.
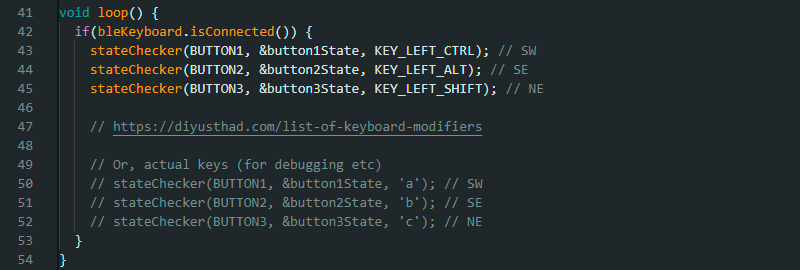
On the ESP32 Feather Board there is a USB port to connect to whatever device you’re working with that will charge the device and can be used to flash it with new code. And a set up a nice and easily understandable section where I can change any of the key switches to any input on the keyboard I can imagine. Sounds like it would also do macros as well but I’m not that far yet. Just having three buttons is an incredible improvement over having basically nothing for about 9 years or whenever I stopped being able to use my left hand.
The Conclusion
You’re probably wondering how well it worked, honestly it worked flawlessly.
The idea is great, and like I said the execution was fantastic, no doubt about it…however I broke it in about 10 minutes. Either I unplugged something or ripped a cable when I was getting in or out of the chair, not really sure which one but unfortunately Andy is about an hour away so as much as I’d love somebody to help me troubleshoot the fix there isn’t anyone on my end that can tear down the joystick and build it back up. Unfortunately I’ll just have to wait until we have the next iteration to get back to where I was for those awesome two days! We discussed it and it looks like we’re going to try to embed the components in the actual joystick platform so something like this won’t happen so easily. To be fair, the Lego board didn’t last real long either but that’s because a door frame jumped out and bit me.
So what about the next iteration? We’re thinking more joysticks…
-mh
I am really impressed with your writing talents as neatly as with the layout on your blog. Is this a paid topic or did you customize it your self? Either way stay up the nice high quality writing, it is rare to look a great blog like this one these days!